How to create a LinkFree account? [Part 1]
Connect to your audience with a single link
![How to create a LinkFree account? [Part 1]](/_next/image?url=https%3A%2F%2Fcdn.hashnode.com%2Fres%2Fhashnode%2Fimage%2Fupload%2Fv1674304483881%2Fcd0cfb5d-c3d5-4ede-8e00-8d1cf149014c.jpeg&w=3840&q=75)
Backend Engineer, & a Go Developer | Open Source Contributor, AWS Community Builder, YouTuber, and Blogger.
A few days ago, I searched on YouTube, how to create a LinkFree account. To my surprise, there was not a single video about it.
I thought why don't I make a video about it to teach others also. Starting open source and sending my first PR was a new thing to me. Fortunately, Dean Lofts asked me to join it and I happily said YES.
We set up the schedule on 18th January and then we had a joined session together about creating the LinkFree account. In the end, I tweeted about it and recorded a video tutorial also so that you can watch it here.
I got help from the LinkFree Quickstart guide and you can also follow the step-by-step process there.
Dean guided me and provided the solutions to the problems that he faced himself. You can check that out in my video also. I will also be discussing those problems in this blog.
Where to Start? 🤔
First, log in to your GitHub account.
Go to the LinkFree repo.
The first thing that you need to do is to give it a star in order to support LinkFree and LinkFree deserves it also.
Click on the upper right corner to fork this repository. A fork will add a copy of the LinkFree repo to your GitHub account.
Once you click on the fork button, it will lead you to another page, in which you can change the repository name if you want to.
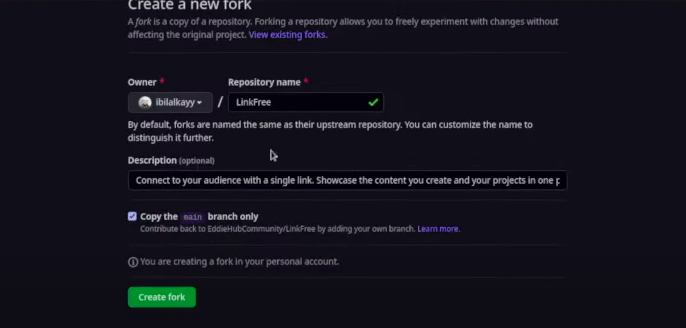
Click the Create fork button.
Once the repo is forked, go to the settings, then go to actions on the left bar and click on the Generals.
After that, click on the disable actions option in the actions permissions menu.
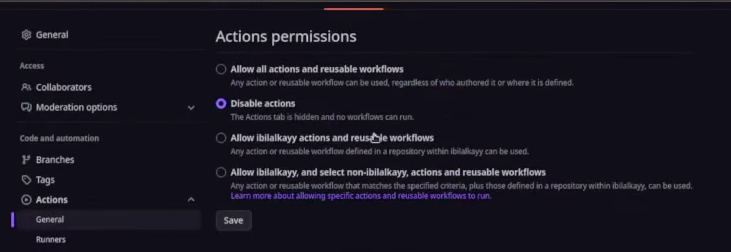
Click on the Save button.
Move back to the LinkFree repo and click add on the new file option and select the "create new file" option.
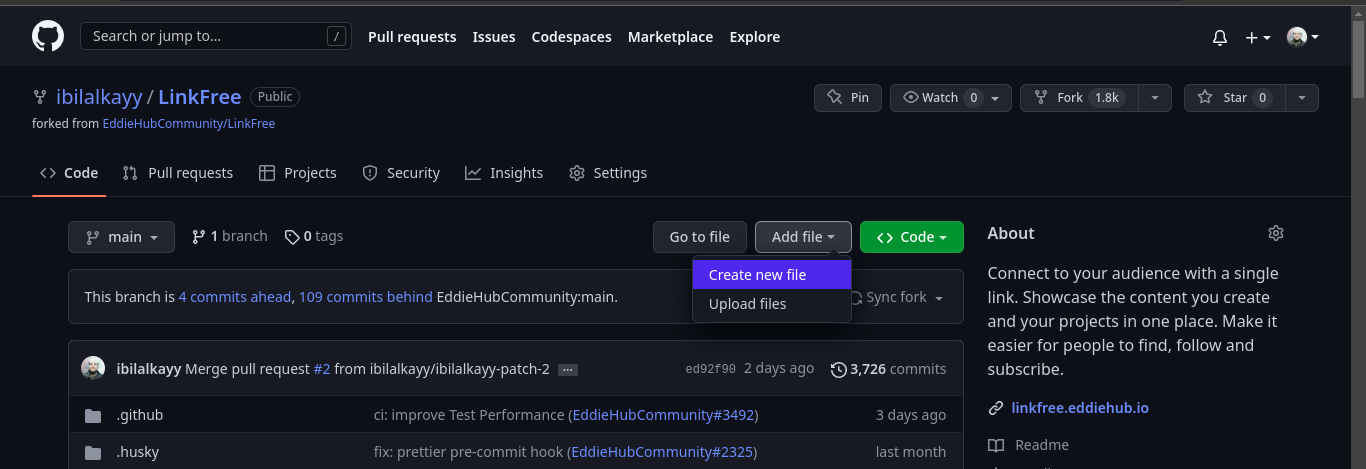
Adding the data into a new file 📂
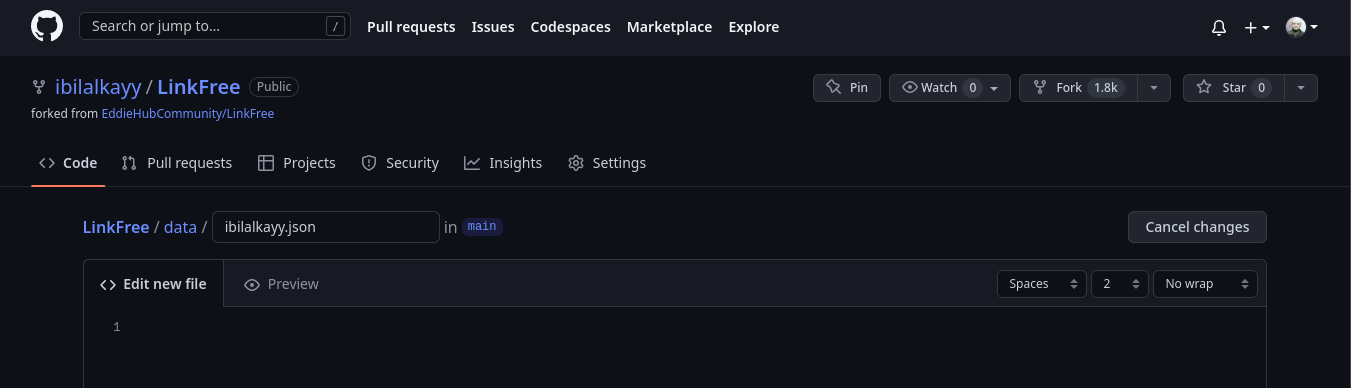
After clicking on it, a new page will open in which you have to insert the data inside the data directory.
Type data in the search bar and then write /. It will automatically include the data directory in a path.
After that, give your GitHub username exactly as it is and then append .json (for example data/ibilalkayy.json).
- Inside a file write the content in a JSON format.
{
    "name": "Bilal Khan",
    "displayStatsPublic": true,
    "type": "personal",
    "bio": "College Dropout ➞ Self-Taught DevOps Guy | Open Source Contributor, Content Creator on YouTube & a Technical Writer at hashnode.",
    "avatar": "https://github.com/ibilalkayy.png"
}
field | type | description |
|---|---|---|
name | string | Display the name on your Profile |
displayStatsPublic |
| Display your page view counter and link click counter |
type | personal / community | The type of account is it a single person or a community |
bio | string | Your description of yourself |
avatar | string | Take your GitHub profile link and append it with |
- Now add the tags and the social links so that they appear on your profile.
{
    "name": "Bilal Khan",
    "displayStatsPublic": true,
    "type": "personal",
    "bio": "College Dropout ➞ Self-Taught DevOps Guy | Open Source Contributor, Content Creator on @YouTube & a Technical Writer at @hashnode.",
    "avatar": "https://github.com/ibilalkayy.png",
    "tags": [
        "Open Source",
        "DevOps",
    ],
    "socials": [{
            "icon": "SiYoutube",
            "url": "https://www.youtube.com/@ibilalkayy"
        },
        {
            "icon": "FaGithub",
            "url": "https://github.com/ibilalkayy"
        }
    ]
}
Tags will show your skills.
You can add multiple social links to your profile. These social links will be appeared with your avatar at the top.
| field | type | description |
| icon | string | The icon you would like to be displayed. LinkFree supports the following icon sets: Fa and Si from React Icons. You can search available icons here |
| url | string | Full URL to the resource |
- Now add the links of your socials in the profile.
{
/*
    Bio, tags and socials should be present here.
*/
    "links": [{
            "name": "GitHub: Checkout my Projects",
            "url": "https://github.com/ibilalkayy",
            "icon": "FaGithub"
        },
        {
            "name": "YouTube: Checkout my DevOps Videos",
            "url": "https://www.youtube.com/@ibilalkayy",
            "icon": "SiYoutube"
        }
    ]
}
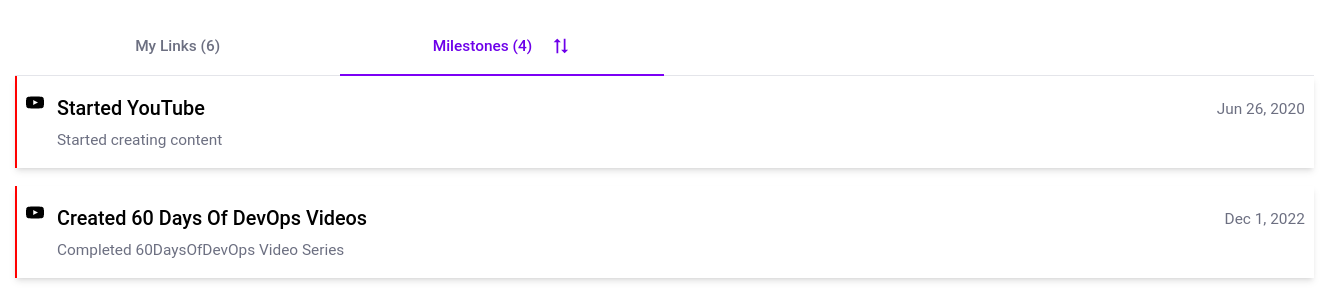
Once the links are added, the next step is to add the milestones.
Milestones are the achievement that you have achieved.
Milestones will be present in another tab of the LInkFree page.
You can checkout my whole page content from here.
{
/*
    Bio, tags and socials and links should be present here.
*/
"milestones": [{
            "title": "Started YouTube",
            "date": "Jun 26, 2020",
            "icon": "SiYoutube",
            "color": "red",
            "description": "Started creating content",
            "url": "https://www.youtube.com/@ibilalkayy/"
        },
        {
            "title": "Created 60 Days Of DevOps Videos",
            "date": "Dec 1, 2022",
            "icon": "SiYoutube",
            "color": "red",
            "description": "Completed 60DaysOfDevOps Video Series",
            "url": "page url"
        }
}
| field | type | description |
| title | string | Title of your milestone |
| date | string | Date of your achievement |
| icon | string | Icon of that milestone |
| color | string | Gives the color when you hover over the milestone |
| description | string | Description of your achievement |
| url | string | Link of your achievement |
Committing your changes 💡
Scroll to the bottom and commit a new file by adding the commit message that starts with
data:followed by your GitHub username (for exampledata: ibilalkayy)You can skip
optional extended messageif you want to.Click on the
create new branchoption and give the branch name or you can use the default branch name if you want to.
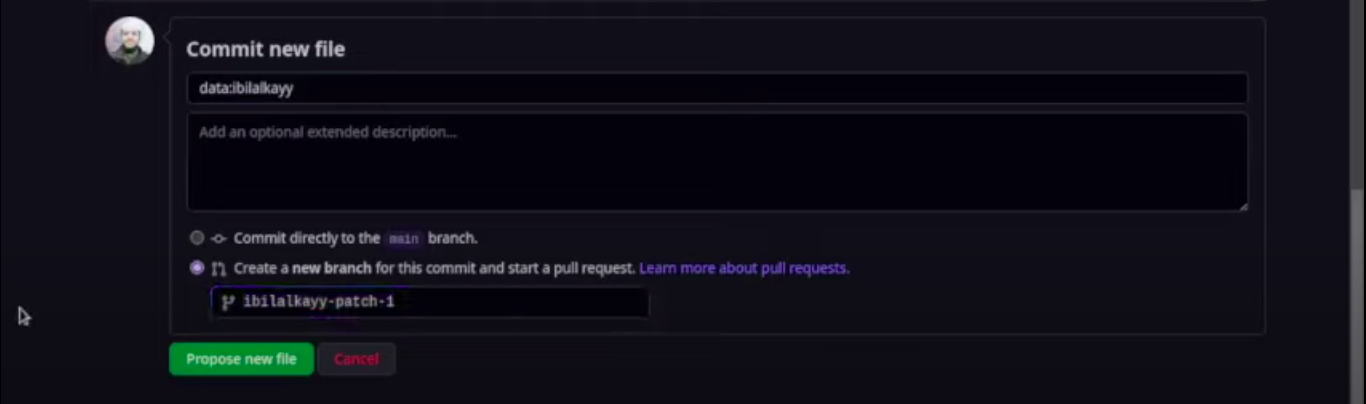
Once you click on the create new branch option, the
Commit new filebutton will be changed toPropose new file.Click on the
Propose new filebutton and it will lead you to another page.
Merge the changes into the local repo 🐱
- Once you click on the Propose new file button, it will lead you to another page.
- This pull request will merge the changes in your local repository. You don't need to worry about the checks.
- Click on the Create pull request button and it will lead you to another page.
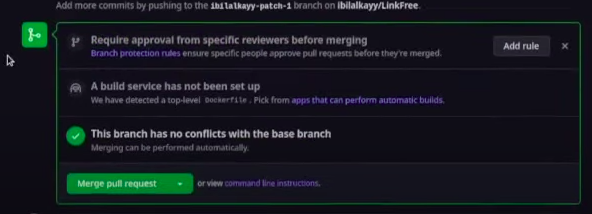
Click on the merge pull request and then click on the confirm merge button to merge the changes in your local repository.
Once it is merged, you can delete your branch according to your preference.

Merge the changes into the base repo 🦊
Now go back to the LinkFree repo in your account.
Click on the contribute button in the upper right corner and click on the open pull request button.
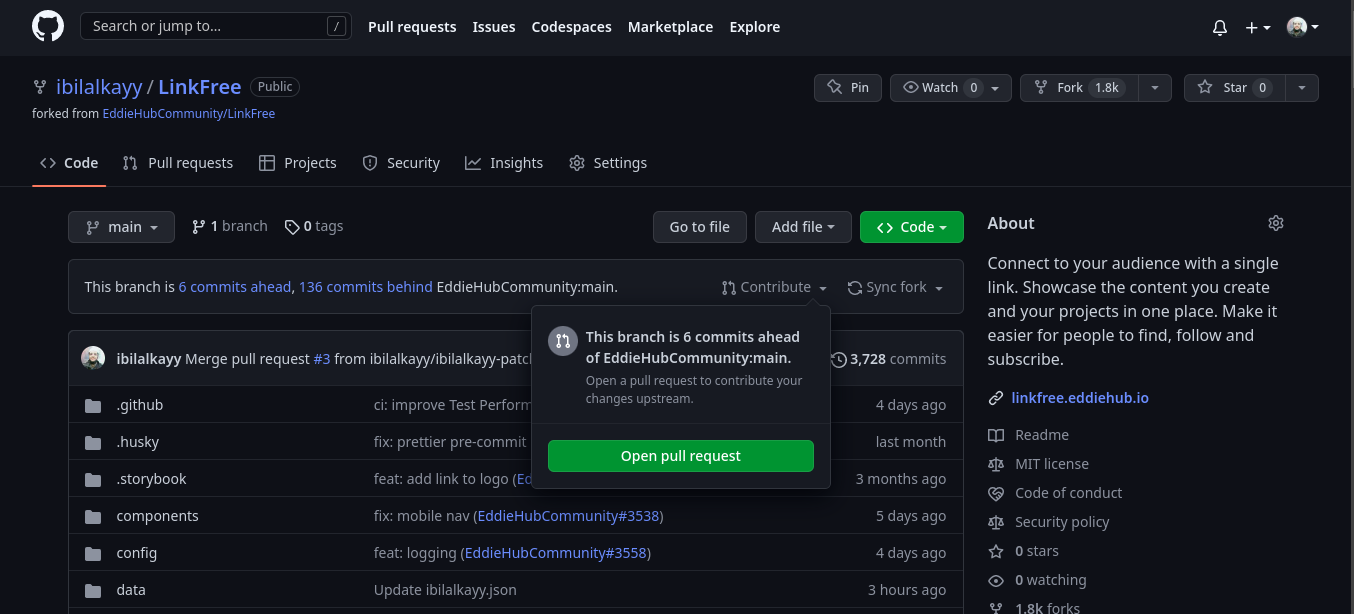
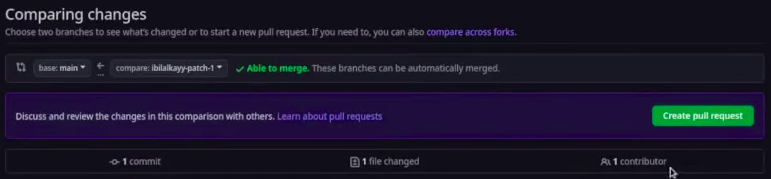
- Once it is clicked, it will lead you to the base repository of the LinkFree in order to compare the changes and send the pull request.
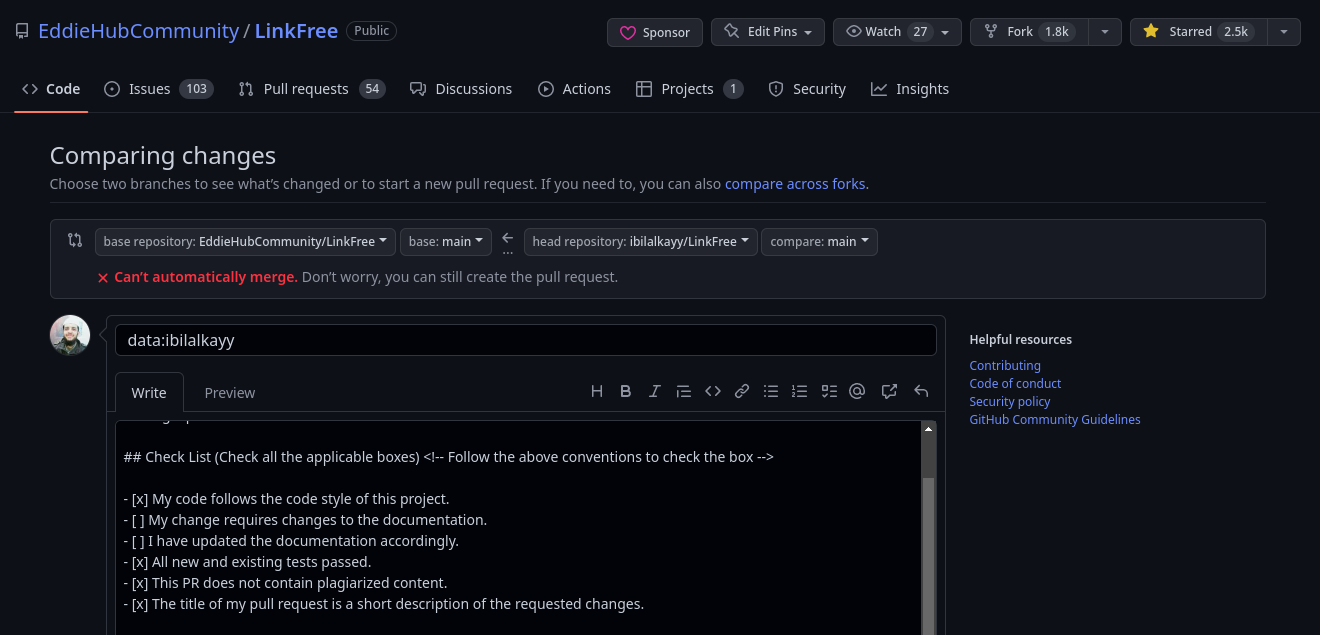
In the title section, write data: GitHub username.
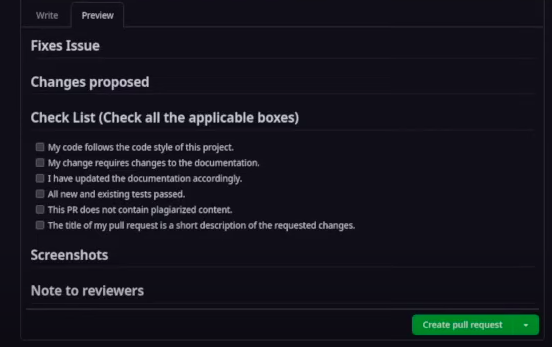
In the description section, write:
## Changes proposed

Adding a profile to the LinkFree account

## Check List (Check all the applicable boxes) <!-- Follow the above conventions to check the box -->

- [x] My code follows the code style of this project.
- [ ] My change requires changes to the documentation.
- [ ] I have updated the documentation accordingly.
- [x] All new and existing tests passed.
- [x] This PR does not contain plagiarized content.
- [x] The title of my pull request is a short description of the requested changes.

## Note to reviewers

Thank you, for letting me create a profile on LinkFree.
Once it is written, scroll down and click on the Create pull request button.
Now you need to wait to have your Pull Request (changes) reviewed.
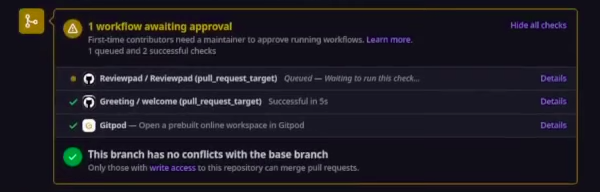
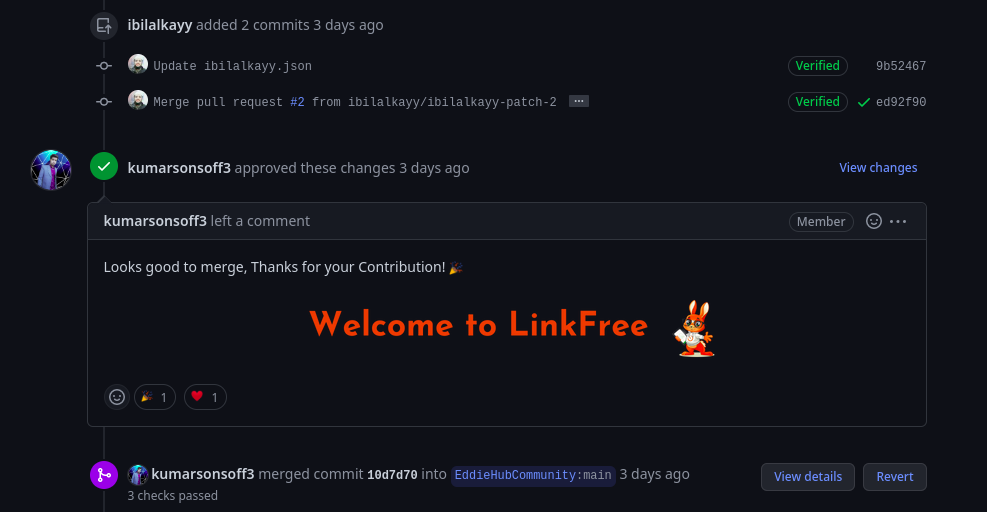
You will receive a GitHub notification when you have a comment, review or your Pull Request has been merged.
Once merged, your profile will be available a few minutes later on your custom url (for example: linkfree.eddiehub.io/ibilalkayy)
That's it. This is the first section of sending your PR to the LinkFree repo.
In the next part, I will adding the testimonials and events. I hope you liked this blog. If you have any questions then you can ask me in the comment section below. I will be happy to answer all your queries.
You can follow me on YouTube, Twitter, and LinkedIn also.
Happy Learning!


